How to leverage browser cache?
Have you included a free Cloudflare CDN on your website yet?
If not then do it right now as a CDN will route the website traffic through its own nameservers thus decreasing the load time. The other effective methods to increase website speed is to leverage browser caching which will dramatically increase site speed.
Here you will be checking:
- Browser cache and the reason to leverage browser cache.
- Cacheable resources.
- Testing of the loading speed of the website.
- Adding expires headers.
- Editing your htaccess file in CPanel
- An effective plugin to add expired headers which works like a charm.
WHAT IS CACHING?
When we visit a webpage for the first time, our browsers store the static files as html, CSS, jS, favicon, graphic images, etc in a temporary storage location in our computer. Hence, when we re-visit that webpage then the browser does not have to download the same piece of information from the server once again, rather fetches the data directly from its cache.
This practice reduces the bandwidth from both the user and server side and hence results in faster loading of the page.
This process is called browser caching.
WHY LEVERAGE BROWSER CACHE?
If we can cache our website resources on our visitor’s sites then it will make the pages load faster whenever they return to the same web pages.
Though it is a rare occurrence, we do change our favicon, images, and other files.
So, if we add expired headers then we can tell our visitors’ browsers that till when they can use the previous set of downloaded data.
Thus enabling leverage browser caching reduces the number of HTTP requests subsequently.
HOW TO CHECK WEBSITE PERFORMANCE
Before you leverage browser caching you should test the loading speed of the website. There are several tools available to check your website performance.
Google PageSpeed Insight, GTMetrix, WebPageTest, Pingdom, and Seo site checkup are among the popular ones.
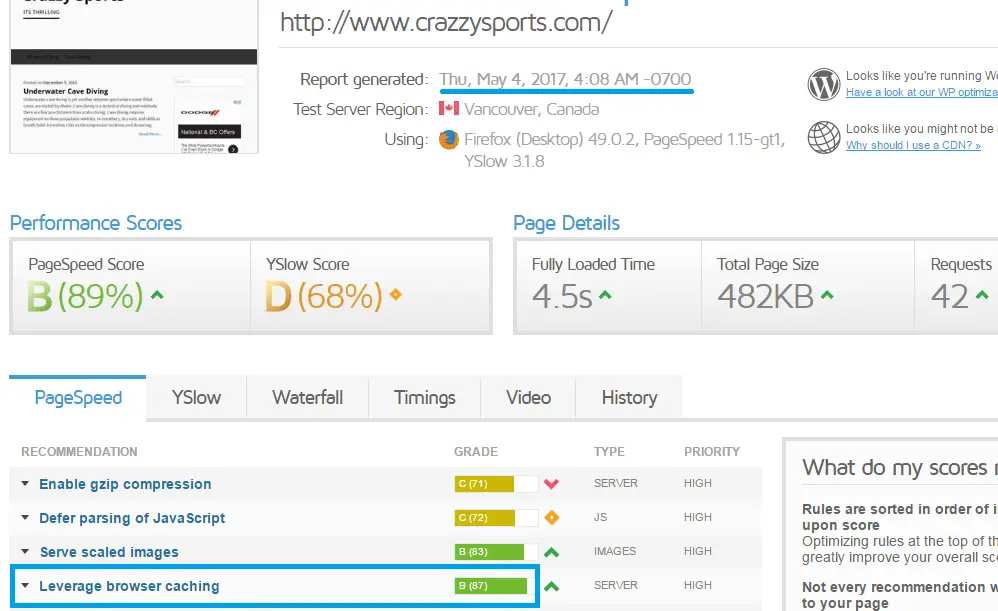
Here I am using GTMetrix to evaluate my web performance.
GTMetrix result:
Results after editing the following codes in htaccess:
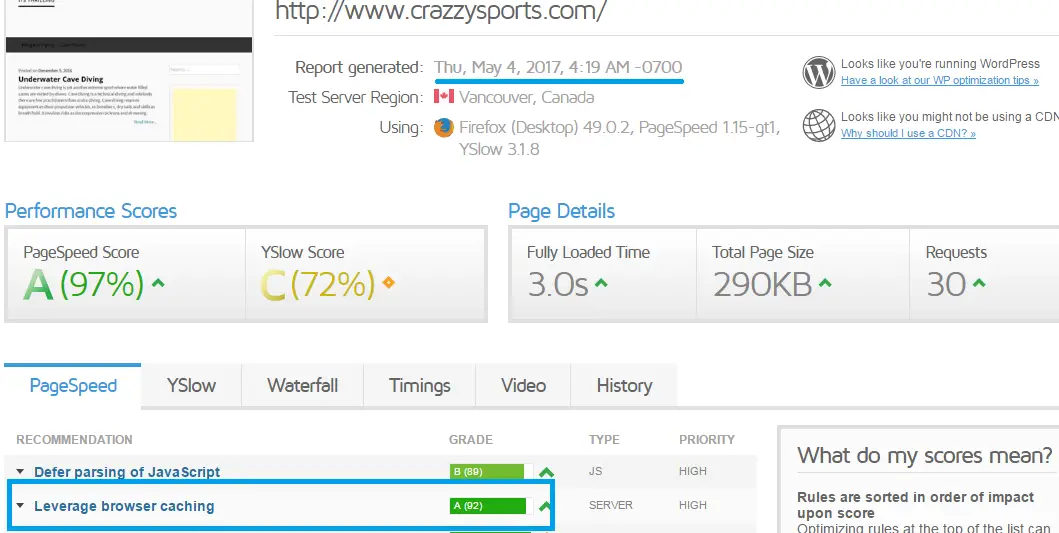
You can find the striking difference between the two results after adding expires to specific resources.
- The fully loaded time has decreased by 33%.
- Leverage browser caching has gone up from grade 87 to grade 92.
- Page Speed score went up from 89% to 97%.
- Yslow scored from 68% to 72%.
This is the advantage of using Gtmetrix as it gives both the page speed and YSlow score.
LEVERAGE BROWSER CACHING FOR THE FOLLOWING CACHEABLE RESOURCES
You can cache the following resources:
- Image(jpg,gif,png,jpeg)
- Text(HTML,XML,plain
- Favicon(x-ico,x-icon)
- Application
- Javascript
- CSS
How often do you change the different files? Think about it as you will be setting different expires headers for different resources.
It is not recommended to have a default expiration header set for all. Your text and image files will definitely be more active than your site logo and stylesheets.
Expires headers can be set in the following possibilities:
- years
- months
- weeks
- days
- hours
- minutes
- seconds
HOW TO ADD EXPIRED HEADERS?
When you add expired headers it means that they will be cached in your visitor’s browsers for the amount of time you allocate.
Starting from Far Future expires.
Expire Headers for your site logo/ Favicon
ExpiresByType image/x-ico “access plus 1 year”
ExpiresByType image/x-icon “access plus 1 year”
Expire Headers for your images
ExpiresByType image/gif “access plus 1 month”
ExpiresByType image/jpeg “access plus 1 month”
ExpiresByType image/png “access plus 1 month”
I have set my images to 1 month as it is likely that I will be updating my images frequently.
Expire Headers for your audio/ video files
ExpiresByType audio/ogg “access plus 1 month”
ExpiresByType video/mp4 “access plus 1 month”
ExpiresByType video/ogg “access plus 1 month”
ExpiresByType video/webm “access plus 1 month”
Expire Headers for your text files
ExpiresByType text/html “access plus 3 days”
ExpiresByType text/xml “access plus 1 seconds”
ExpiresByType text/plain “access plus 1 seconds”
Expire Headers for your application files
ExpiresByType application/xml “access plus 1 seconds”
ExpiresByType application/rss+xml “access plus 1 seconds”
ExpiresByType application/json “access plus 1 seconds”
HERE IS HOW MY EXPIRES HEADERS LOOK LIKE
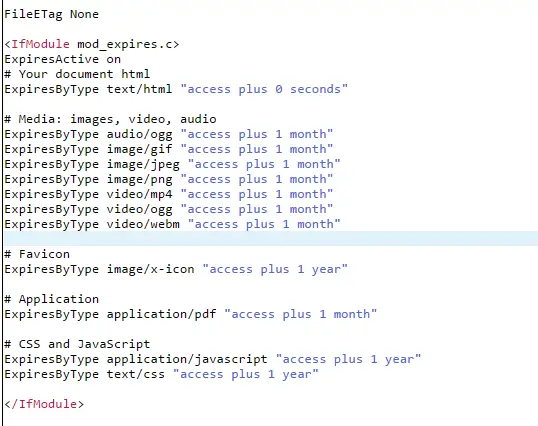
I have very simple coding included in htaccess file.
#Putting expiration on
<IfModule mod_expires.c>
ExpiresActive on
# Your document html
ExpiresByType text/html “access plus 0 seconds”
# Media: images, video, audio
ExpiresByType audio/ogg “access plus 1 month”
ExpiresByType image/gif “access plus 1 month”
ExpiresByType image/jpeg “access plus 1 month”
ExpiresByType image/png “access plus 1 month”
ExpiresByType video/mp4 “access plus 1 month”
ExpiresByType video/ogg “access plus 1 month”
ExpiresByType video/webm “access plus 1 month”
#Favicon
ExpiresByType image/x-icon “access plus 1 year”
ExpiresByType application/pdf “access plus 1 month”
# CSS and JavaScript
ExpiresByType application/javascript “access plus 1 year”
ExpiresByType text/css “access plus 1 year”
#End
</IfModule>
I have set my CSS and Javascript files to 1 year as I do not update them frequently.
Setting up Expires headers completely depends upon you and the type of website you are running.
HOW TO ADD TO WORDPRESS HTACCESS FILE?
Warning! Be very careful while editing your htaccess file. If you code something wrong you can mess up your WordPress site.
I recommend copying your original htaccess file content in notepad or word document. If necessary you can paste the original file content and go back to the default htaccess file settings.
1. CPanel> File Manager

2. CPanel File Manager will open up.
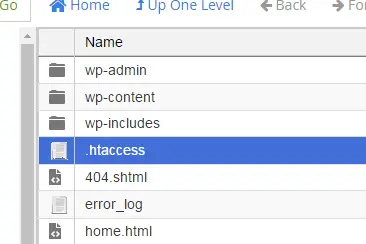
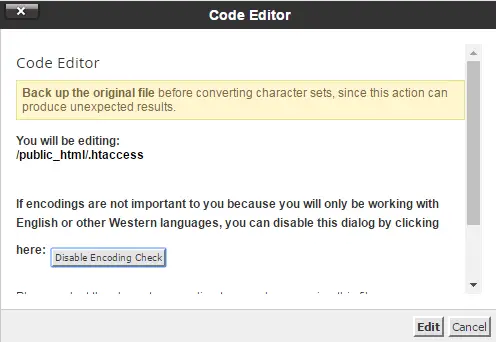
3. Right-click on htaccess file> Code Edit
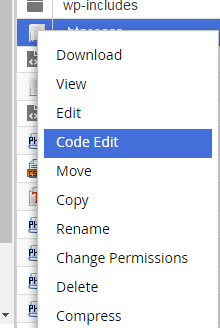
4. Click on edit on the new window
5. Start writing from where the default coding ends and SAVE CHANGES.
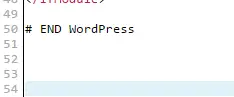
If you are editing the htacess file for the first time then you should have only <mod_rewrite> as default.
ADD EXPIRES HEADERS WORDPRESS PLUGIN
If you are not very comfortable editing your htaccess file then you can use a robust plugin for it.
FAR FUTURE EXPIRY HEADER
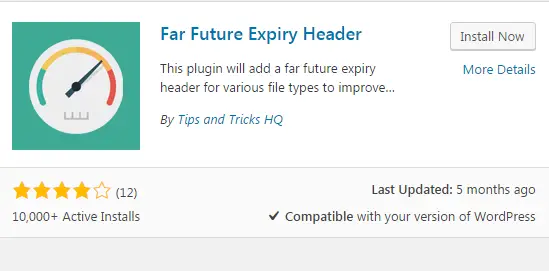
Install> Activate
WordPress Dashboard>Settings> Far Future Expiry
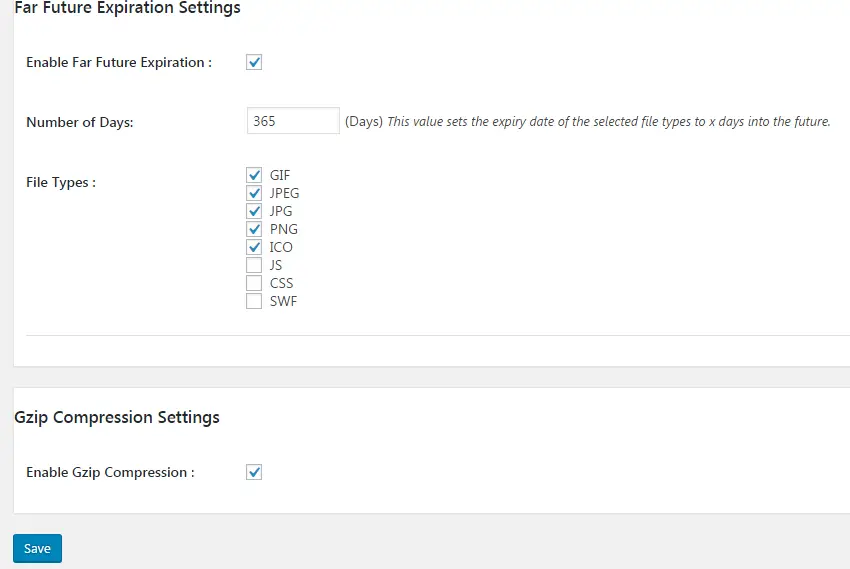
This plugin sets an expiry value for resources like images, CSS, Js, and favicon. I have set it for 365 days.
You can also tick on JSS, and CSS files. I have omitted it as I am using the W3 cache plugin which provides with similar kind of service.
This plugin will give you some exceptional results.
WEB PAGE TEST RESULTS
After including the above expires headers you will also notice that there is a surge in ‘Static Cache Content’ of Web test page results.
Before

After

IT’S WRAPPING TIME
Can you enable browser cache for third-party resources such as Google Adsense and others? No, you can not as they are external and you do not have control over their source files or the HTTP response headers.
Check out all the other factors affecting the WordPress site speed.
If you are concerned about your webpage speed then leveraging the browser cache and writing the codes in htaccess file is definitely going to help you.
If you modify your static resources before the expiry time mentioned then you can check the cache-busting techniques or add the last modification to the header.


