GOOGLE ANALYTICS TRAINING FOR BLOG BEGINNERS

How to use Google Analytics?
When you are checking this post it means you already know what is google analytics. Just after your site is launched, you should set up google analytics.
If you have just launched your blog then here are 9 ways to make your blog look professional even if you are a newbie.
This Google Analytics tutorial will help you to track your visitors as well as give you the data that which platform is sending you the most number of viewers. That can be Google, Pinterest, or any other search engine or social media.
Google Analytics Setup gives us free detailed website data.
GA provides us with much more details than any other paid internet analytics.
In fact, Google Analytics is also pretty simple to set up and we can easily get the tracking ID for our single or multiple websites which in turn can be linked to our WordPress, Blogspot, or any other sites we are using.
GOOGLE ANALYTICS SETUP

1. HOW TO GET GOOGLE ANALYTICS TRACKING ID
1. Sign Up with Google Analytics.
2. Your Account Name can be anything that describes your account. It can even be your name, your company name, or anything you want to. To give an example am setting it to Demo.
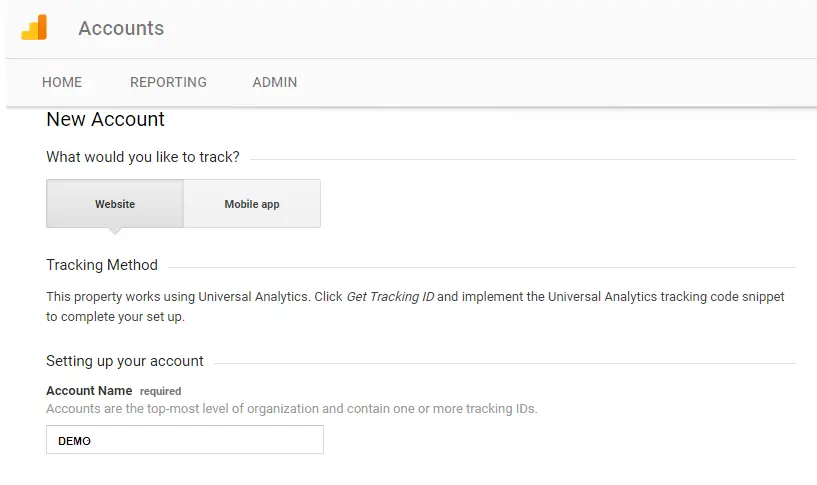
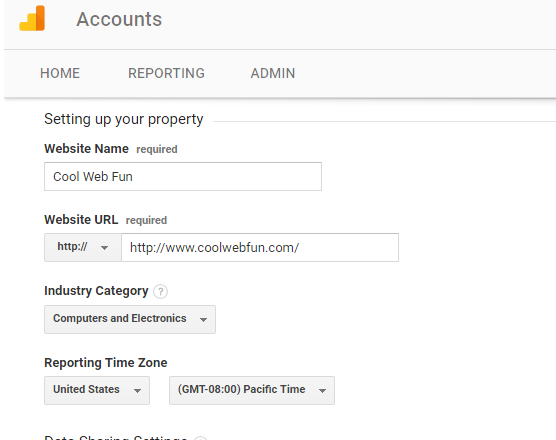
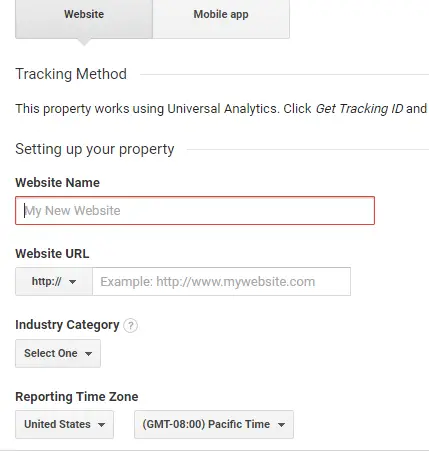
3. Here you are setting up your first property. So provide your website name and URL.
Selecting an industry will not affect your data but it is wise to select the correct industry.
Setting up of correct reporting time zone is important as it will be reflected in your data.
4. Keep the recommended settings. 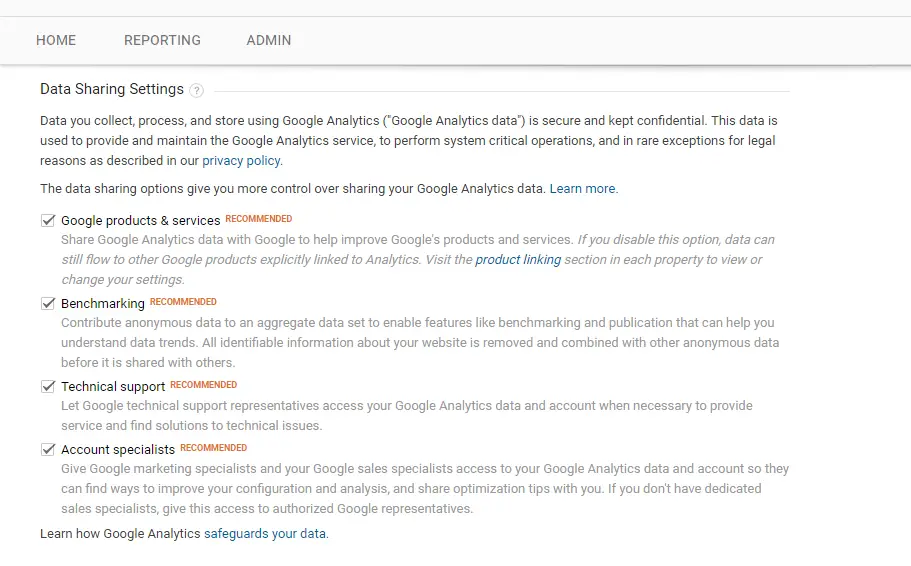
5. Get Tracking ID.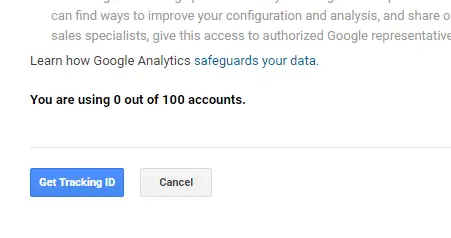
6. So you have got the google analytics Tracking ID for the website URL you have submitted. 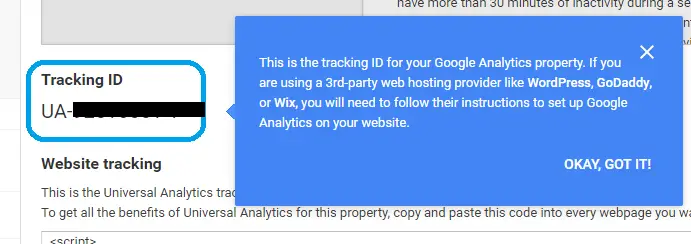
2. HOW TO ADD ANOTHER WEBSITE TO GOOGLE ANALYTICS

When you create multiple websites and wish to add Google Analytics to all of them then you can add it to the same account which you have already created.
50 is the highest number of Google Analytics property tracking IDs that we can create, that is the number of websites that you can add to a single account name. That is a helll lottttt.
1. Anyways, let’s go to Google Analytics dashboard> Admin Settings at the bottom left of your page. 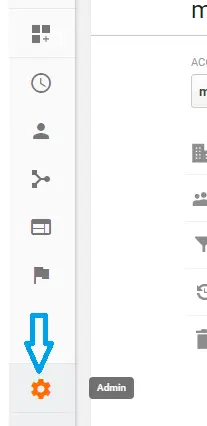
2. Click on the drop-down list which you will find beside your website name. You will get to create a new property.
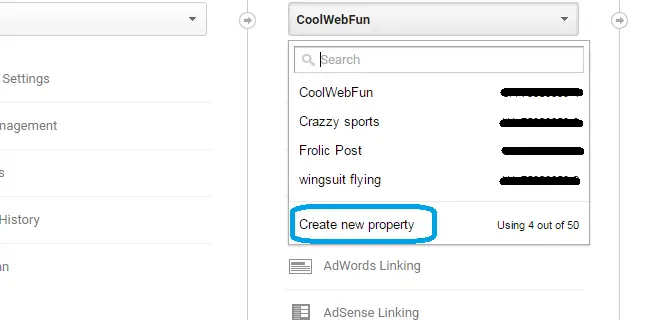
3. Fill in the website name and URL the same way you did while setting up the google analytics dashboard.
4. Click Get Tracking ID. Now you have successfully got the tracking ID for your 2nd website.
3. HOW TO ADD GOOGLE ANALYTICS TO WORDPRESS WEBSITE

You can use a plugin or add it manually.
1. PLUGIN
a. You can use the Google Analytics WordPress plugin.
Just install and put your tracking ID and you are all set.
b. I use Google Analytics by WebKinder.
This is also a free plugin. Install from WordPress, put in your tracking ID, and done. I use this particular plugin because it does not track my personal page views.
So I know, I have not added up to my overall pageviews. Helps me to get the actual number.
2. CODING MANUALLY
Earlier I used to do it manually but as I said it was adding up my pageviews so I switched to the plugin.
If you want to avoid excessive use of plugins then go to Google Analytics > Admin(left-bottom with settings sign) > Property Settings
![]()
![]()
Click on Tracking Info > Tracking Code
![]()
![]()
Copy the Code under Website Tracking It will Look like this
![]()
![]()
Now go to:
WordPress Dashboard > Appearance > Editor > Theme Footer Paste the copied code at the end > Update File
Google Analytics can also be added to the website by Google Tag Manager or Global Site Tag.
4. GOOGLE ANALYTICS REPORTS

If you look at your analytics report you will find real-time, audience, acquisition, behavior, and conversions. We will go through each of them ~ the ones which are important for bloggers
REAL-TIME
Overviews: This gives us the overall picture of the visitors who are on our site right now. 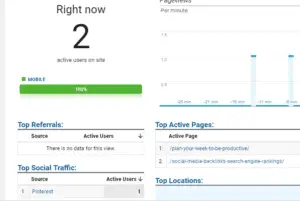
As we can see there are 2 visitors checking the posts ‘plan your week to be productive‘ & ‘social media backlinks‘. The traffic is coming from Pinterest. Locations:
If we click on locations, it gives us the country name.
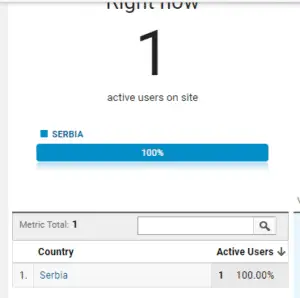
It is stating the country’s name as ‘Serbia’. You will get a list of country names when there are more active users.
Traffic Sources: We have already checked in the overview that Pinterest is the traffic source.
Content: The content means the posts. It shows the SEO titles of the posts which are currently observed by visitors. If you do not know how to set SEO titles then check the ideal SEO keyword setup in Yoast.
AUDIENCE REPORT
Next comes the audience report. This is the one which I check every now and then. 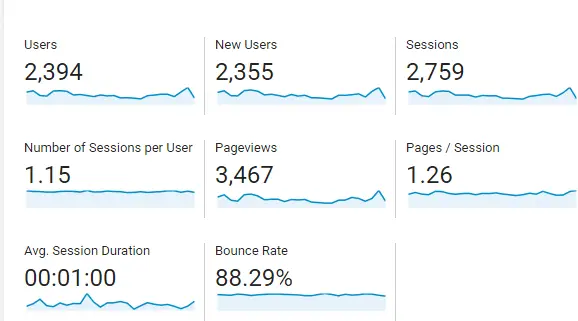
I mainly check to see my page views and sessions for the day. You know once you are having 25000 sessions for consecutive months then you can apply for the Mediavine ad network.
If your monthly page views are over 100000 then the Adthrive network can also be joined. Well, I do not want to get more into monetization methods as this post is about google analytics tutorials.
Google Analytics bounce rate: Did you check that I had a bounce rate of 88%. Though my bounce rate is 81% currently.
So what does google analytics bounce rate mean?
It means the amount of time a user is spending on your site and bouncing back.
So, the lower the bounce rate, the more engaged your blog is.
Generally, it fluctuates between 70-80% for most of the users.
There are different ways by which you can lower your google analytics bounce rates.
You can put more engaging images, videos, and worthy content.
Overview:
NOTE: Audience overview is what you should be checking daily. You should always check your google analytics every day and notice what is bringing you traffic and what methods are NOT.
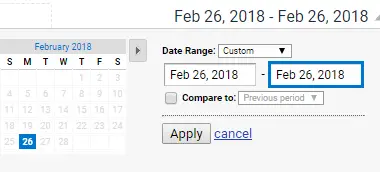
You can check your daily visitors by selecting a single date> apply

If you want to check any particular month at a glance then select the month on top as shown above. Next, I would like to show an interesting feature which is a comparison.

When you tick on the compare box, you can have a comparison with the previous period or can custom settings it.

It will make your comparison easier to watch for any particular period. Active Users: It gives the data for 1 day, 7 days, 14 days, and the last 28 days of active users.
Take note this is a number of users and not pageviews.

Lifetime Value:
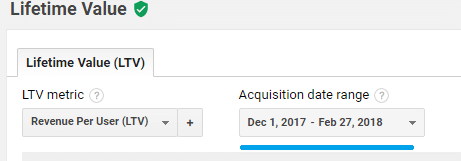
You can set your data range and it will give you the number of users you had from specific sources.
User explorer:

This part though may be important for bloggers but not much of use to me as I do not know who the clients are.
Okay, it’s good to see that some of the users having so many sessions so they seem to like my site.
Demographics and interests: The advertising feature includes these analytical data. It gives the age and gender of the visitors. This is required if your posts surround a particular genre.
Geo: It is the data about the language and location of visitors. If your online venture is limited to a particular area then probably you would need this.

Behavior: New vs Returning: The data with new and returning visitors. I think it is always better to have more returning visitors, which means your site is trusted.

Frequency vs recency: Gives the time a visitor spends on your site.

Engagement: The best part for me in the behavior section is this engagement. As I can see how many visitors are actually reading my posts.

Technology: This is the data reporting the browser, operating system, and network of the visitors.
I do not require this data as a blogger as I do not need the info about my visitors’ operating system or who is their service provider.

Mobile: Here you can check whether your visitors are surfing from a desktop, mobile, or tablet.

It also gives info about devices name as Apple, google nexus 5, and others.
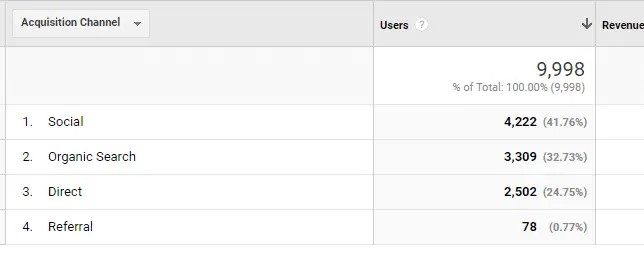
Benchmarking: Channels: The channel grouping data about whether it is from social media, organic, or others.
Location: Visitors’ location

Devices: As discussed earlier the devices whether from the desktop, mobile, or tablets.
ACQUISITION REPORT
Overview: At a glance, it gives us data about new users, sessions, bounce rates, and average sessions.
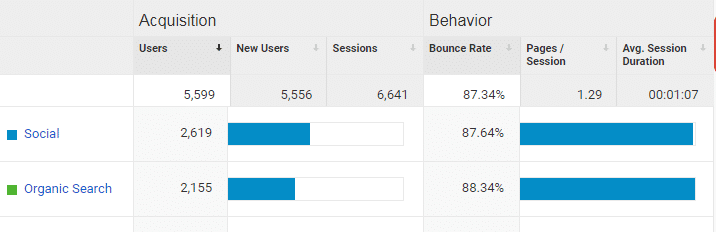
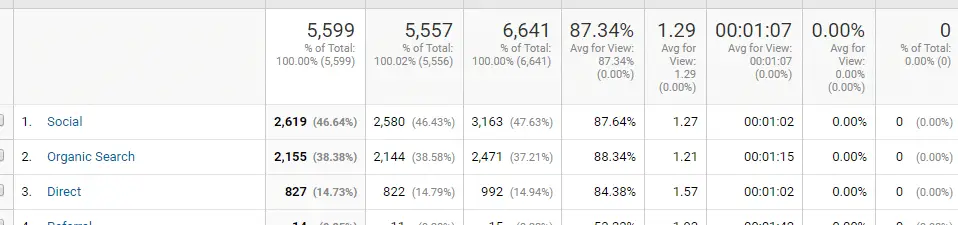
All Traffic: Channels: Once again the data about the traffic channels
Here if you click on organic search> Secondary dimension> Behavior> Destination page
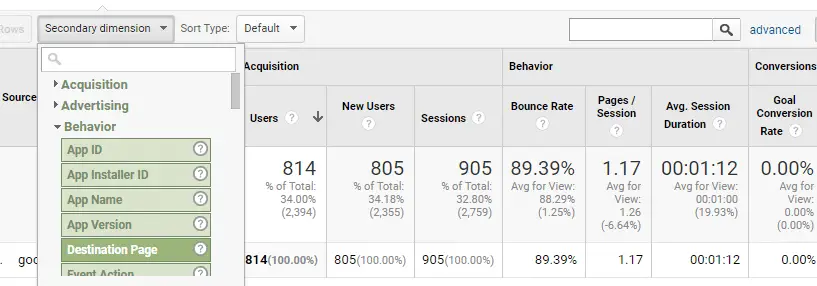
It will give you the landing pages from the Google search engine. By this, you can know where your SEO is working and on which posts you should focus. Treemaps:
It is for those who are using AdWords Source/Medium: This is another section apart from the audience overview which I check daily.
I need to know whether most of my traffic for the day is an organic or Pinterest referral.

Referrals: It discusses only the referral traffic Adwords: Not getting into details of it as it is for the advertisers. Search Console:
It gives the data of your site performance in Google search. If you have not yet set up your search console yet then follow ‘How to get your website in Google’ to get the search console data.
Social: If in 2018 you are not using social media for your website then you are missing out on a bigger share of the traffic. Overview:
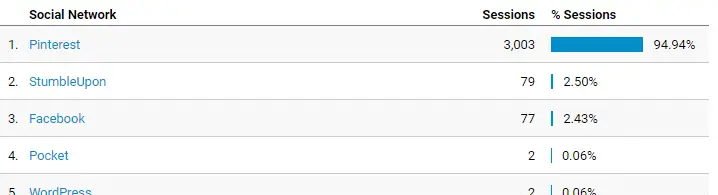
Network Referrals: Definitely the one to give social networks sessions and pageviews.

Landing pages: Another important data. You can see which of your posts is bringing the most traffic. 
Campaigns: All Campaigns: If you see here it will give you the data of the services you are using. Though I am not an active participant of tribes still it got me, someone.

Organic Keywords: The keywords which bring you traffic from Google or other search engines.

BEHAVIORAL REPORT
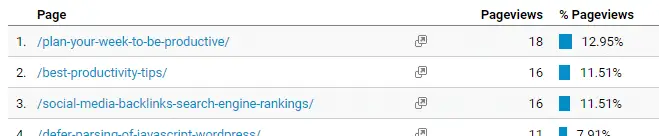
A behavior report is important to understand how people interact with your blog. Overview: Behavior overview will give you the titles bringing you the most number of page views.
Site Content: All pages: Same data with a number of unique page views and average time on page.
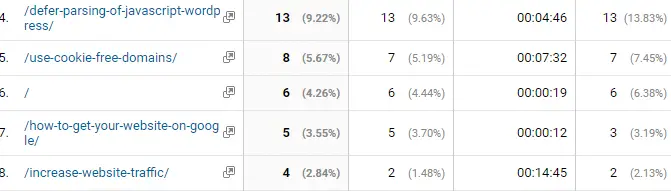
Landing and Exit pages: The data providing the page details of the visitors coming and leaving your site.
Site speed: Overview: Google penalizes websites that take a lot of time in downloading their data. So you should always keep your site speed up to the mark.
If you want to increase your website speed by 70-80% then take this free website speed e-course.
Speed suggestions: Gives you the page views along with the average speed load time.
Ah! I am tired of writing each and every step 😀 Okay, so this was all about the analytical data which you may need as a blogger. If any questions you can ask for sure.
Read on:


